Updated: December 16, 2019
Changes to the appearance and function of KIVAT BELT and Tatsurot
Hello everyone, this is Funasen.
In today's CSM Developer Blog, I would like to use photos to explain how the appearance of KIVAT BELT and Tatsurot has evolved from the DX version.
First, let's talk about "Kivat Bat III"!
Kivat props come in two different sizes.
One of them has the same shape and size as the DX version, and is used in the scene where Watari goes "gobble" and bites into his hand.
The other is the Kivat that he is holding as he attaches it to the Kiva buckle, which is shown in the scene change after the "Gab" sound.
This is a Kivat enlarged to suit prop size, and the balance of the sculpture is different from the DX toy.
The CG Kivat was also created based on this image.
This time, the size of Kivat is the same as the DX version, and the design is based on a middle-of-the-road concept of CG and Kivat in belt form.
There is a reason why the size is the same as the DX version: if the Kivat were enlarged to belt size, it would be impossible to hold it in one hand and perform the "gobble" motion.
To begin with, it was so large that you couldn't hold it in one hand and rotate your fingers around it, so in order to perform the same transformation sequence as in the movie, the size had to be DX.
However, even though the same design as the DX version is used in the "Gabu" scene, the impression given by the DX version of Kivat's design is different from the shape and expression of Kivat that we often see in the video.
Therefore, in order to ensure that the impression when viewed from the front is the same, the design of the Kivat itself was recreated to be worn on a belt.
By the way, the Kivat belt prop is much thinner than the DX version, but if it was made as thin, the internal mechanism wouldn't be able to be included, and there wouldn't be enough depth to bite into your hand properly when you bite into it, so it was made the same thickness as the DX version.
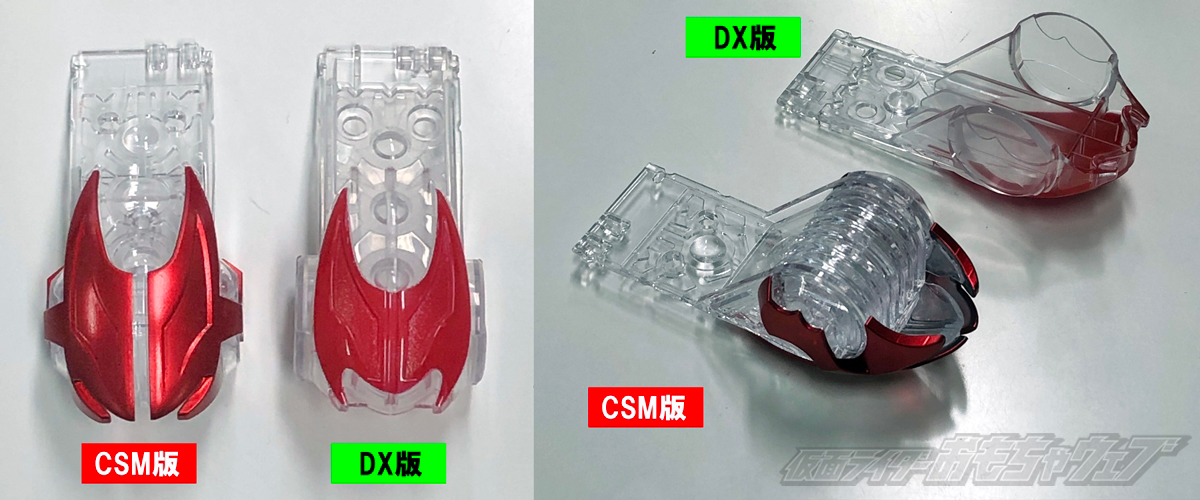
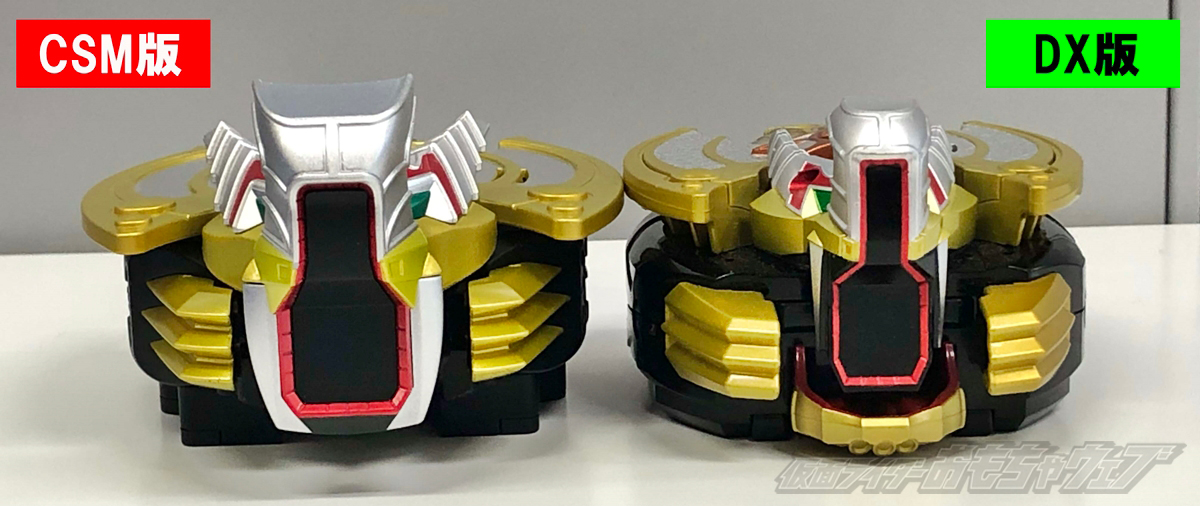
Below are the front and back designs compared to the DX version.
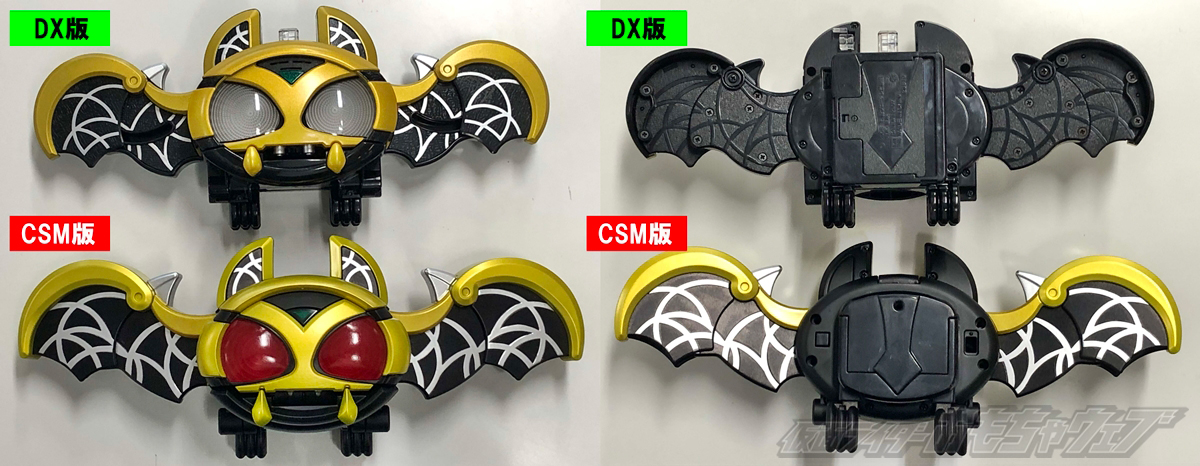
The wings on the underside are also well sculpted and even painted.
The DX version only has outer vanes on the surface, but the CSM version covers both sides.
In addition, in the DX version, the guide holes on the inner blades on the surface, which are used when opening and closing the blades, have been filled in.
By the way, if this hole were to be removed, it would not be possible to create a uniform gap between the outer and inner blades, which would cause the paint on the inner blades to rub off. However, by using the "special paint process applied to the belt" which I explained in a previous blog, it has been made so that the color does not fade easily even when rubbed.
The design of the inside of the wings when spread out has different line details between the real prop version and the CG version, but this time we matched it to the real prop.
So here's the most noticeable change.
Push button on the top of the head!
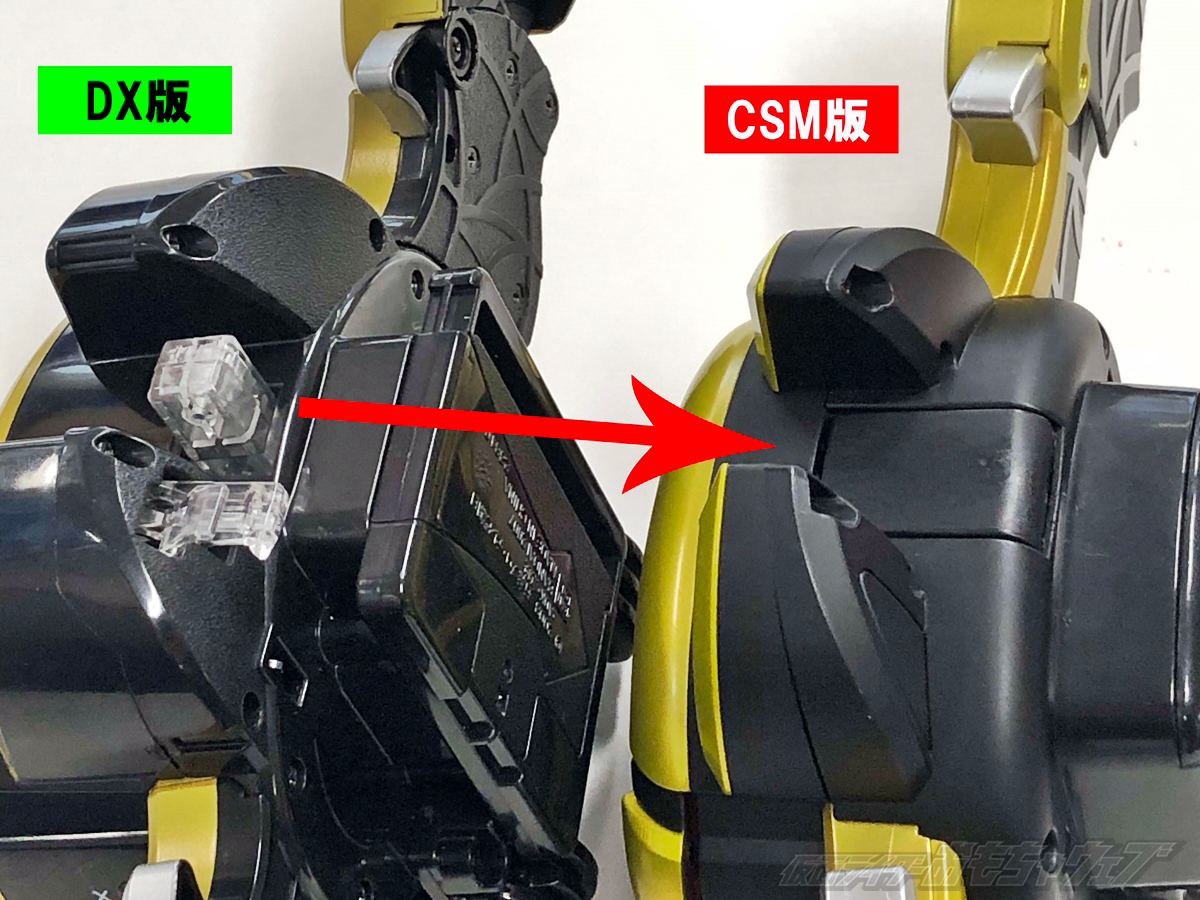

The button for opening and closing the mouth was always going to be noticeable, but this time we've made it smooth and redesigned it so that it pushes in from the surface of the head.
This makes the kivat state look natural.
Additionally, this button can be rotated 90 degrees to create the state shown in the second image.
This also makes it possible to virtually recreate the props in the DX version and when it "gabbes".
Another notable feature of the DX version is the claw parts for locking the buckle when it is attached.
In order to reproduce the appearance of the Kivat, this was also removed from the Kivat side and a locking mechanism was installed on the Kivat buckle side.
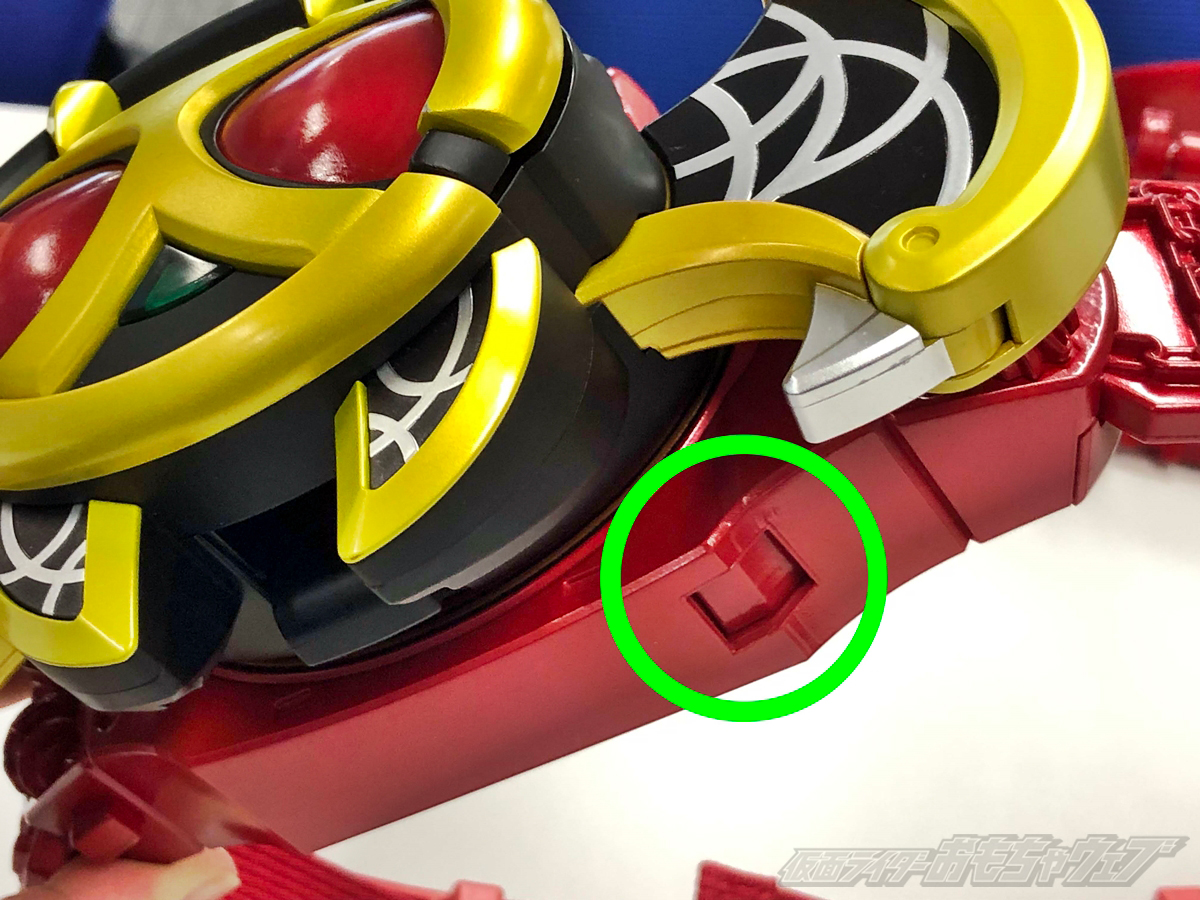
The unlock button is located at this position.
This is a Ki buckle, but the characteristic chain detail has been attached to the obi part as part of the design.
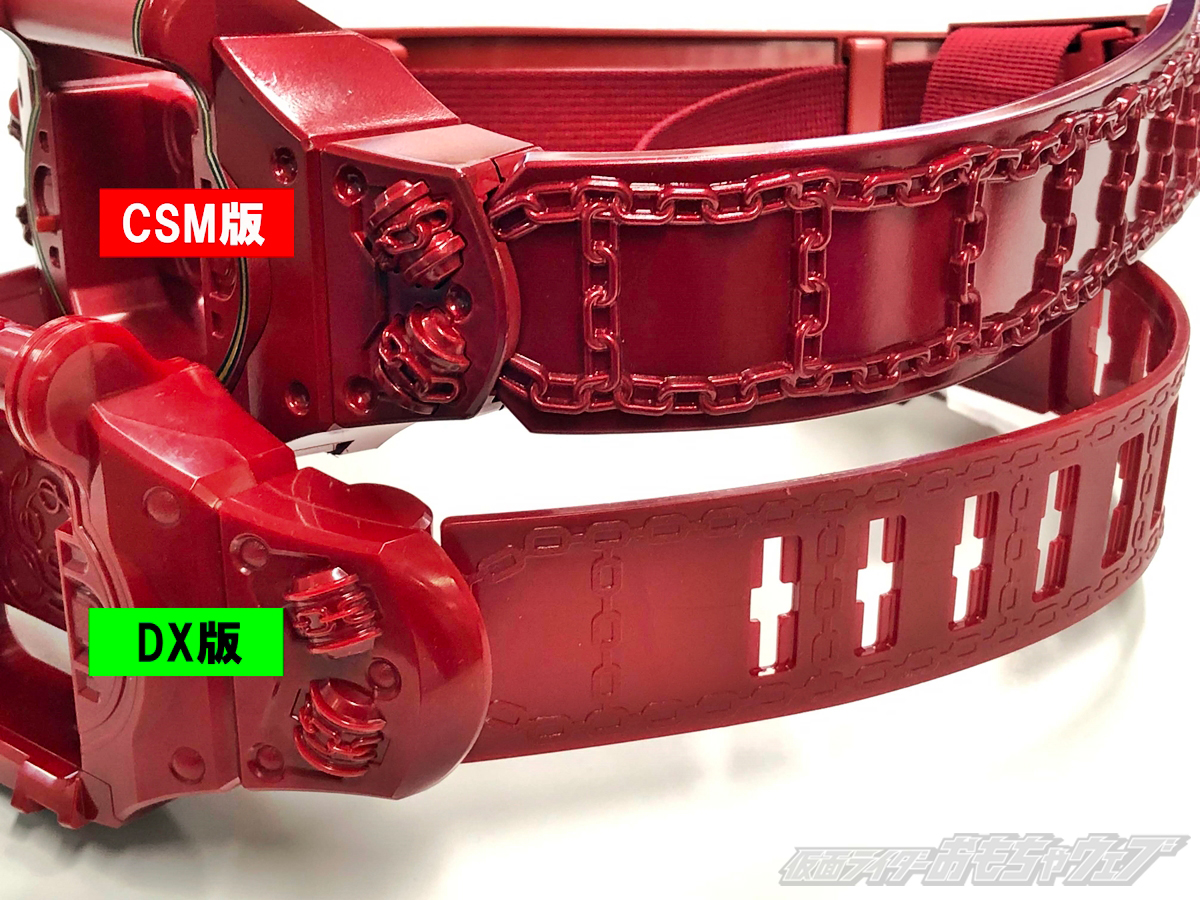
The prop is on an independent chain, but it would be impossible to make this chain independent and wrap all the way around a mass-produced toy.
However, slight sagging due to gravity is clearly reflected in the design, so please take a good look at that!
Next is the whistle.
When comparing the Wake Up Whistle with the DX, the following differences can be seen.
The DX was made up of one part, and the unevenness on the side was greatly simplified so that it could be removed from the mold, but this time the part was divided into small parts and a special bonding method called ultrasonic bonding was used to reproduce the appearance including the back side without using screws.
The same goes for other whistles.
Due to cost reasons, the DX version had a different paint job than the prop, but the CSM version perfectly replicates the prop in both shape and paint.

Finally, about Tatsurot.
When worn on the arm, Tatsurot's prop ratio has been adjusted back to human proportions, making it significantly larger.
Below is a size comparison image of the DX and CSM versions. The tatsurot extends almost to the elbow.

The size of Tatsurot himself has also increased to the same size as Kivat-Bat III, giving it a very different impression from the DX version.
The face seen from the front is also a prop sculpt, so there's a huge difference compared to the DX version!
Although the mold from that time remained, in order to reproduce the image in the movie, all parts were newly sculpted and created using new molds, and the above-mentioned upgrades were made.
That's all for today's Kiva information.
Now, here we begin the second part of our look back at "THE HENSHIN," featuring the second half of the exhibition of past CSM models.
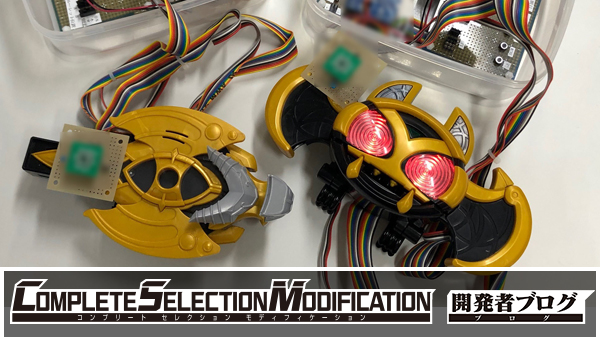
First up is the "Stag Beetle" section!!
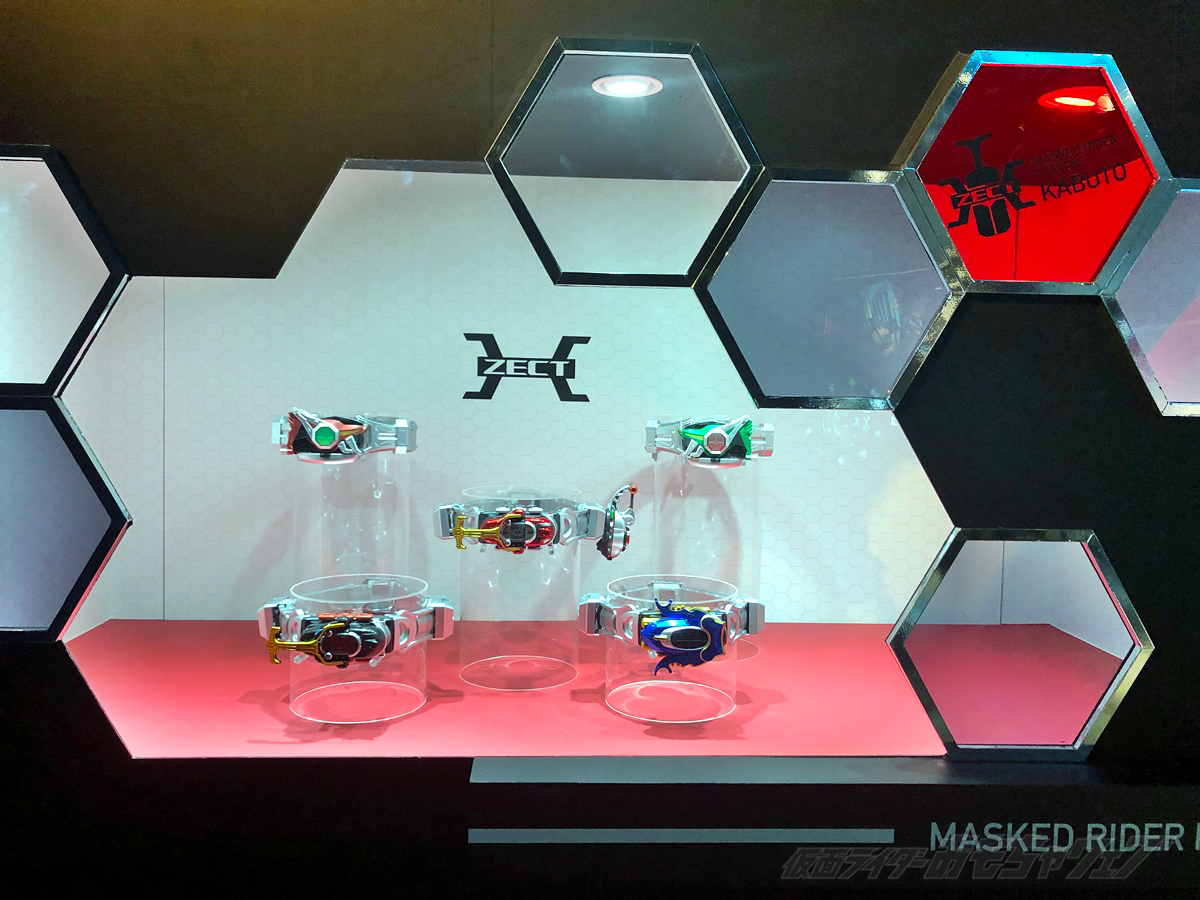
The framework was created using an impressive honeycomb structure frame.
I was actually planning to suspend each Zecter in the empty space to give the impression that they were flying, but the lighting made it obvious that they were hanging, so I gave up on that idea...
Next up is Den-O!
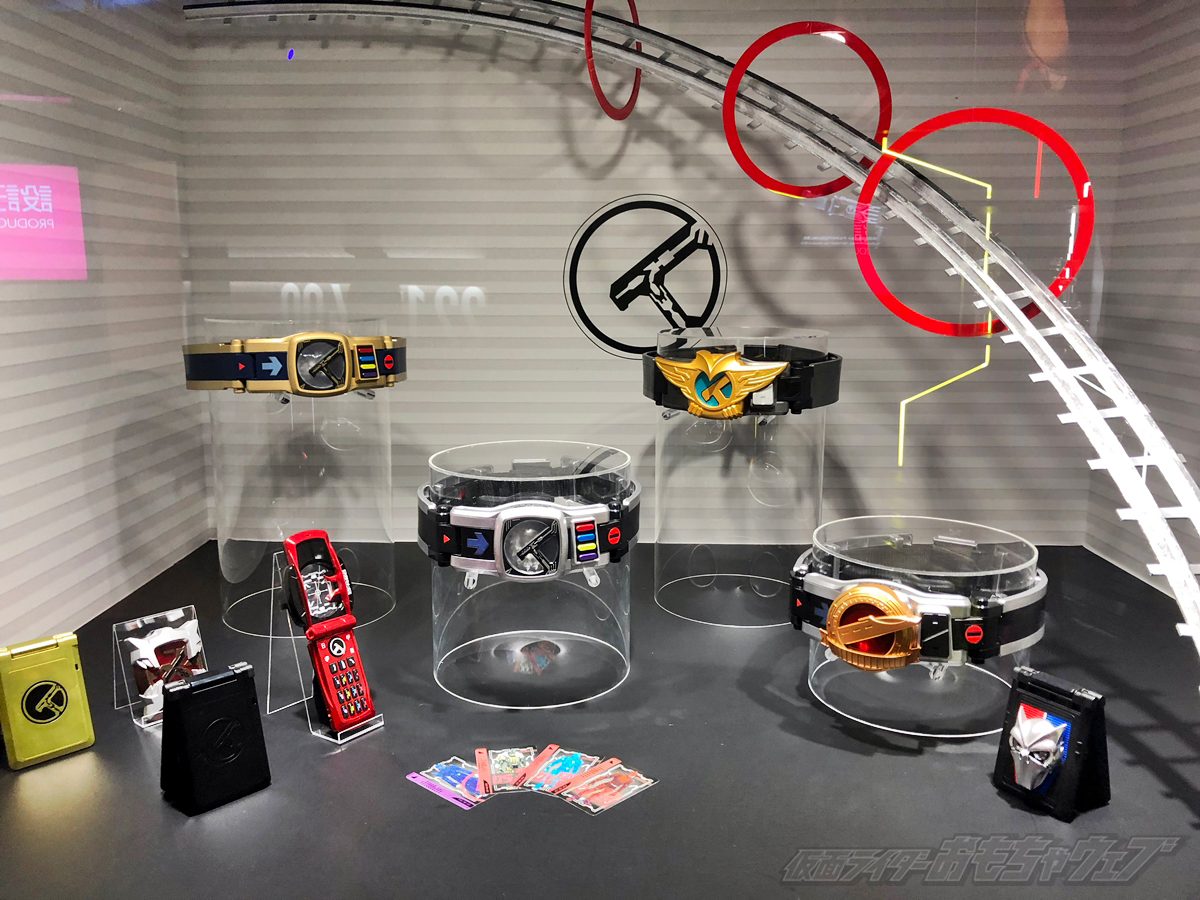
The DenLiner tracks come in from the back, with four belts next to them!
DEN-O BELT from the movie is definitely something to look out for! I'd love to see it commercialized one day... Wing form...
Decade is displayed on a large buckle-designed wall!
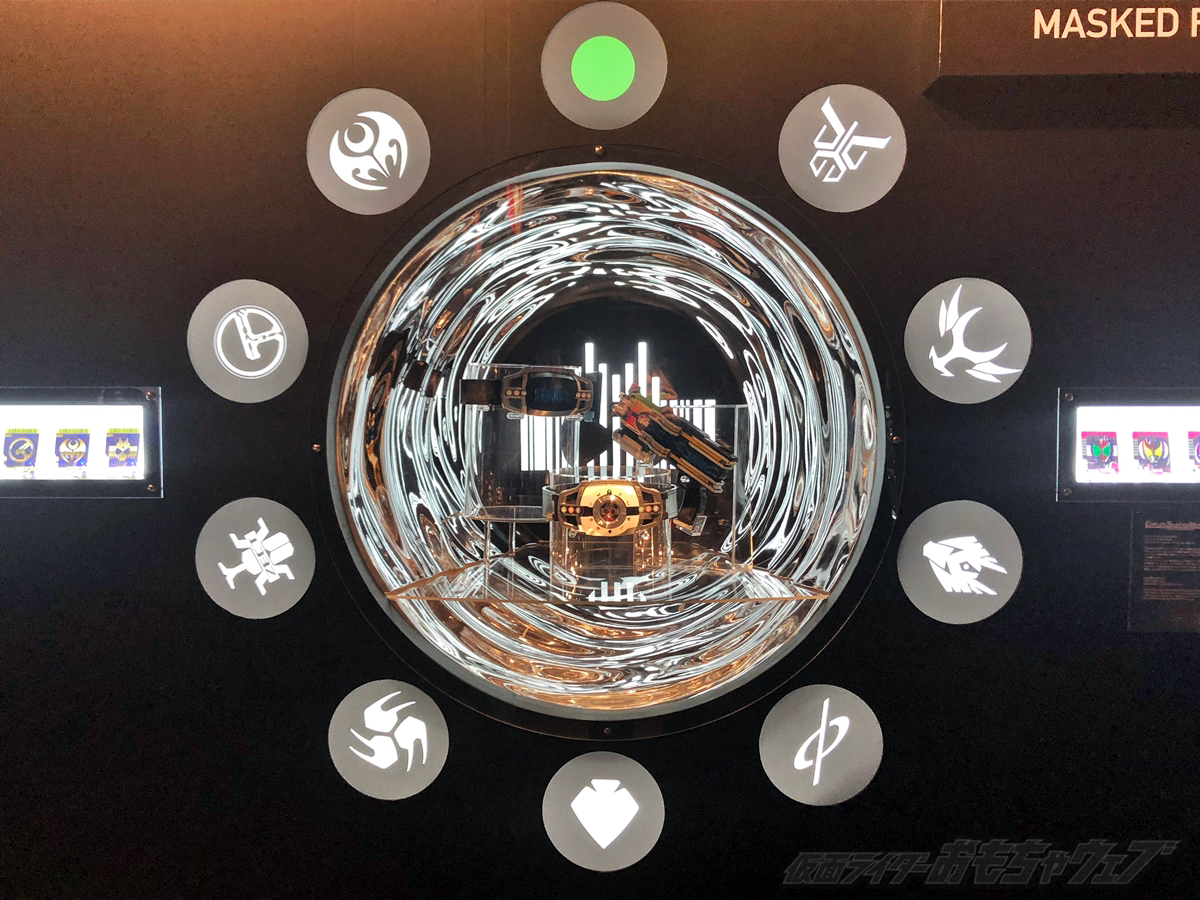
The inside is plated with a distorted circle, which was created to represent the curtain effect that Decade creates as he moves through the worlds.
The W stands for double, and is on a wall that is divided into left and right.
The latest version, ver. 1.5, was also on display at the venue, so people were able to see it for comparison.
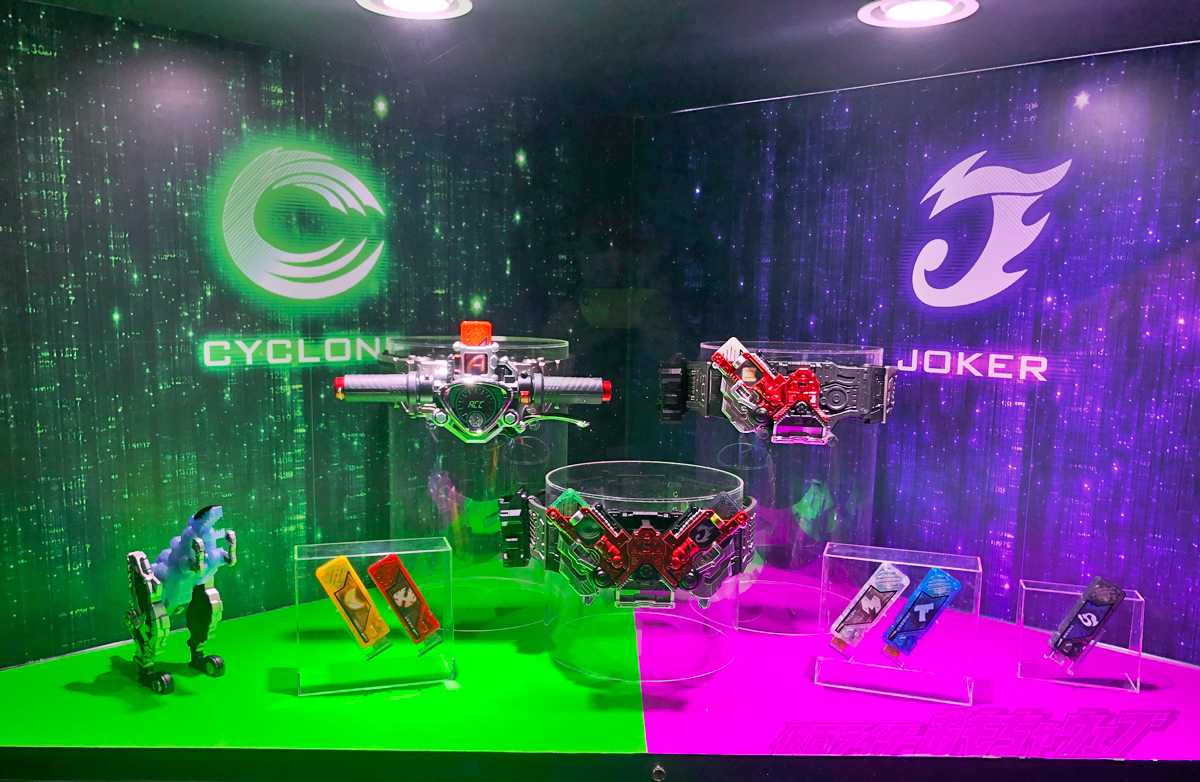
Oars! Oars! Oars! Oars! Come on!
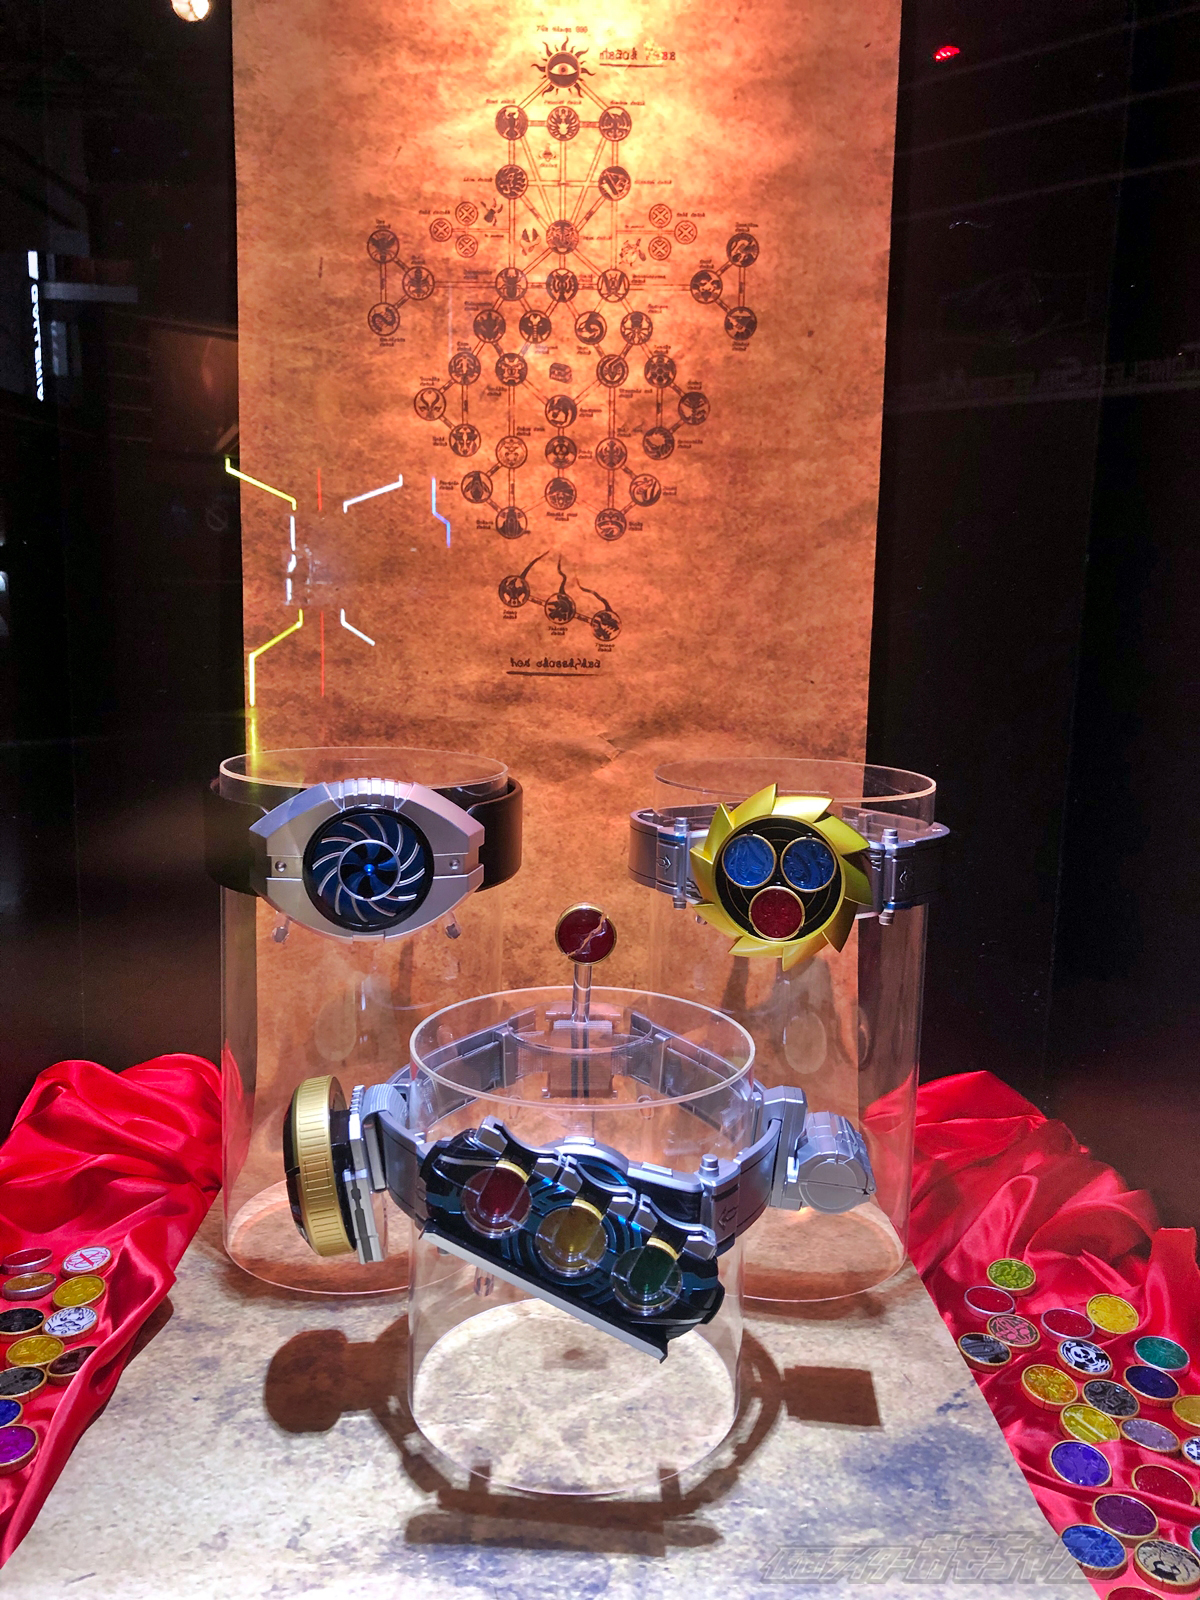
It was created based on the image of Chairman Kougami's secret room that appeared near the final episode.
The exhibit was set against a hanging scroll of Sephiroth. The Poseidon Buckle has already been commercialized, but the Aqua Driver, HENSHIN BELT of KAMEN RIDER Aqua, who faced off against the main character in MOVIE War MEGA MAX and became a hot topic when he appeared in Zi-O, was also on display.
This character transforms completely based on his pose.
It's also fun to think about how to make the transformation sounds happen in the toys. (In the movie, the transformation was done by posing only.)
Finally, the Amazons!
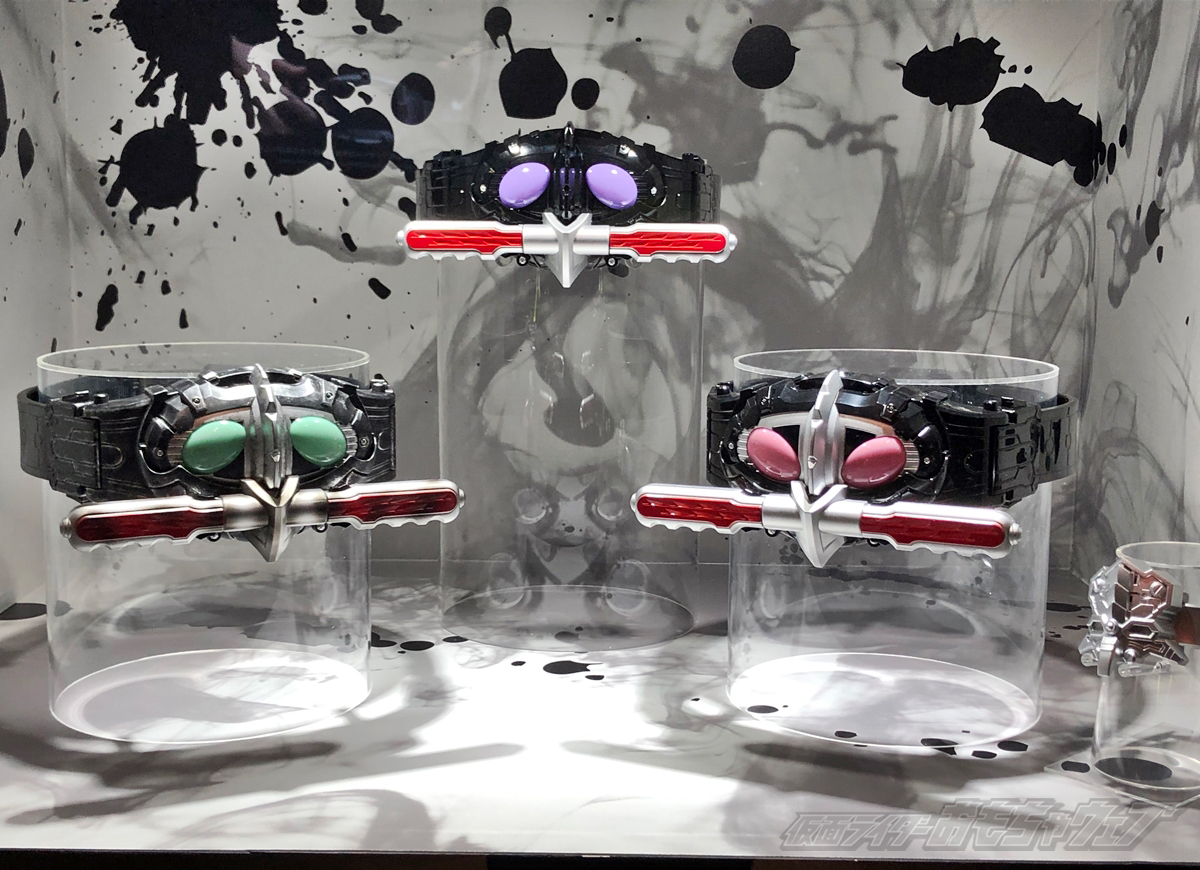
The space was designed to look like blood splatter, but red would be considered a no-no, so we used black. This is a self-imposed restriction.
We also exhibited a dirty painted version as an alpha version.
I wonder if this can be mass-produced...
This concludes the concept explanation for the event exhibition.
That's all for today's blog.
The next update will be on Monday, December 23rd.
Well then!
商品情報
商品情報
share


Related topics
-
New songs to be included in KIVAT BELT! & other specifications.
December 23, 2019
-
Thank you for coming to THE HENSHIN! Looking back & Kiba...
December 9, 2019
Related products